Choose a container that will hold up outdoors
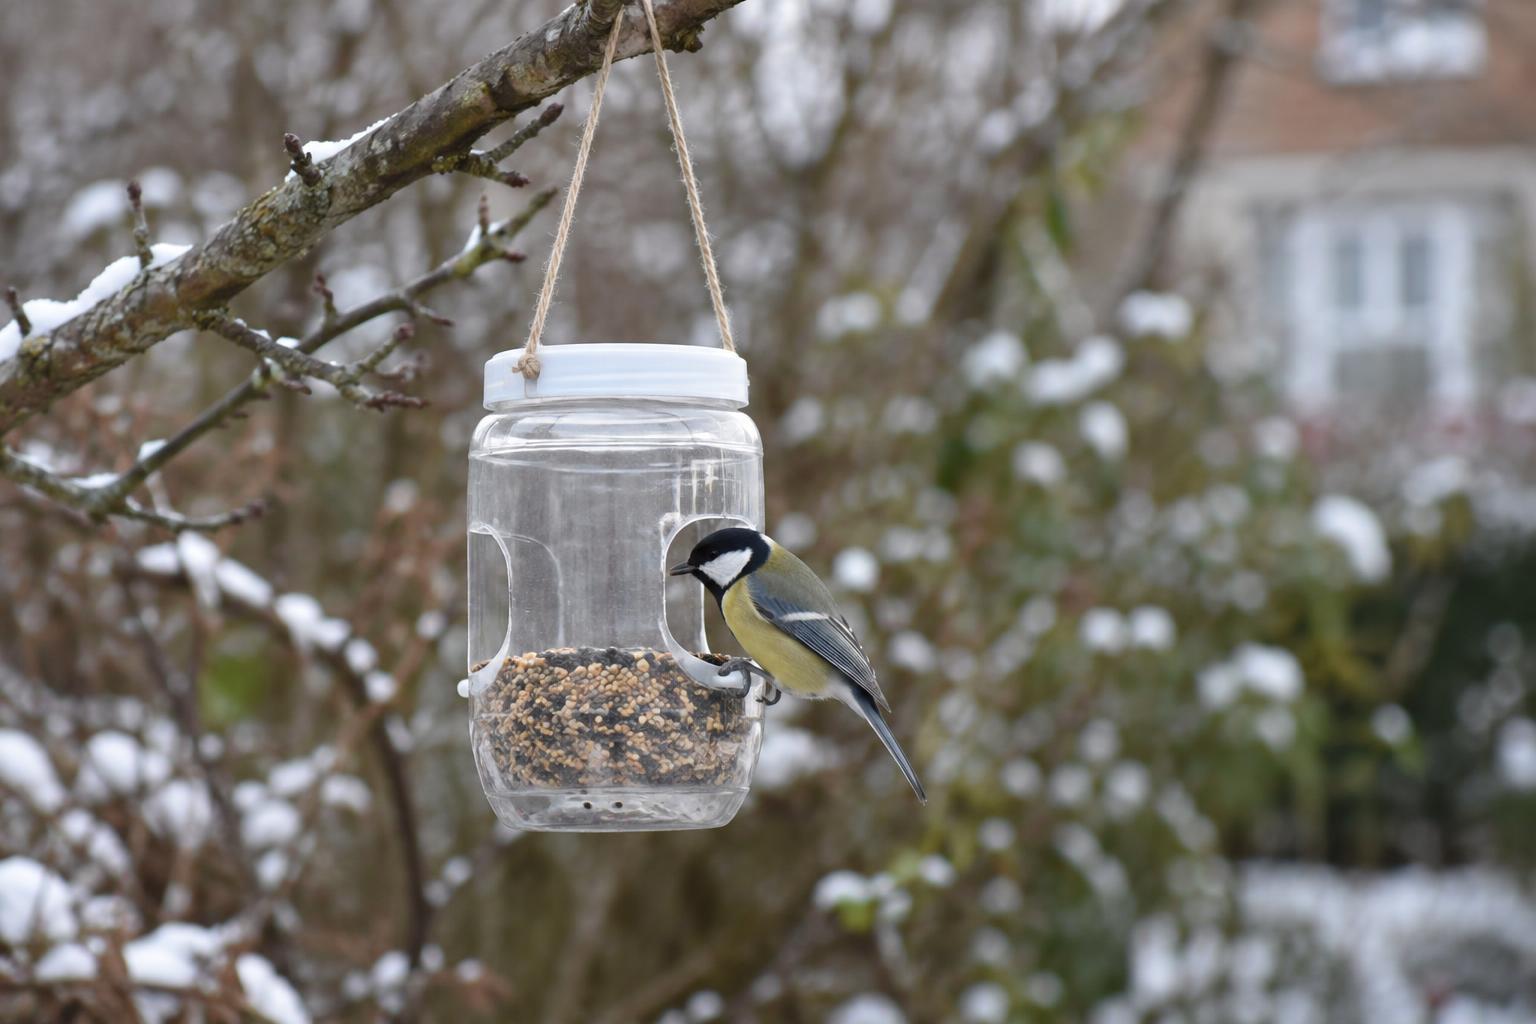
A small, rigid plastic food container with a secure lid makes a practical feeder. Choose one that is clean, intact and easy to open for refilling. A wide container may let several birds crowd around the food, so a modest size is easier to manage. Avoid containers that held chemicals, have brittle plastic or have sharp metal parts. Wash the container and lid with warm, soapy water, rinse well and let both dry completely before you begin.
Gather a marker, a tool suited to making holes in the container, sturdy cord for hanging and a shallow tray or newspaper to catch offcuts. An adult should make any cuts or holes. If the plastic cracks as you work, choose another container rather than leaving a break that could develop into a sharp edge outdoors.
Make openings for food, drainage and hanging
Mark two small feeding openings on opposite sides, a little above the container’s base. They should be large enough for a bird to reach seed but not so large that rain easily blows in. Make several small drainage holes in the base so moisture cannot collect beneath the seed. Smooth every cut edge and check it with a cloth: if the cloth snags, the edge needs more attention.
For a hanging feeder, make two holes near the top on opposite sides. Thread the cord through them and tie secure knots, leaving enough room to remove the lid without dismantling the hanger. Gently pull on the cord to test it. Skip loose loops or dangling lengths that could tangle around wildlife. Before filling the feeder, close the lid and give the empty container a light shake to check that it stays shut.
Add a small amount of suitable seed
Fill the container only partway with plain birdseed suited to birds in your area. Starting with a small amount helps you see whether the spot attracts visitors and whether the seed stays dry. Do not put out bread, salted snacks or seasoned leftovers. Keep extra seed in a closed container indoors, away from damp and pests.
After rain or snow, look inside rather than assuming the lid kept everything dry. Remove wet, clumped or moldy seed promptly. A homemade feeder is most useful when you can reach it easily enough to check it often; choose a smaller fill if food sits untouched for long periods.
Pick a spot with birds and windows in mind
Hang the feeder from a stable hook or branch where it will not swing into a wall, walkway or doorway. Keep it out of reach of pets, and avoid placing it directly over a place where people sit or prepare food. Look beneath it, too: spilled seed can attract unwanted visitors and will need to be cleared away. If you rent or share an outdoor space, check that feeding birds is permitted before putting anything up.
Window safety matters wherever birds gather near a home. Avoid a position that encourages birds to fly toward clear or reflective glass. If the feeder will be near a window, use a visible window treatment designed to help birds notice the glass. Choose a location you can observe and maintain without stepping onto an unsafe surface, especially in icy weather.
Keep the feeder clean through winter
Check the feeder regularly for damp seed, droppings, damage and loose knots. Empty it before cleaning, then wash the container with warm, soapy water, rinse thoroughly and allow it to dry completely before refilling. Clean up spilled seed beneath it as well. Wash your hands after handling the feeder or seed, and avoid cleaning feeder parts where you prepare food.
If you notice sick-looking birds or several dead birds nearby, pause feeding and follow local wildlife guidance on cleaning and when to resume. You can also take the feeder down whenever upkeep becomes difficult. A small, well-maintained feeder is a better winter project than a large one that stays full but cannot be checked.