Choose a spot and a container
A winter container can make an outdoor corner feel welcoming after summer flowers have faded. Start by choosing where it will sit: beside a door, against a wall or where you can see it from indoors. That location will help you decide its size. Leave enough room for people to pass, and choose a container that will not tip easily in wind.
Use a weather-suitable pot with drainage holes. Some materials are more vulnerable to cracking when wet contents freeze, so check whether your container is intended for outdoor winter use. If you are reusing a summer planter, remove dead plants and loose debris first. Place it in its final position before filling it; a weighted pot is awkward to move.
Gather cuttings with varied shapes
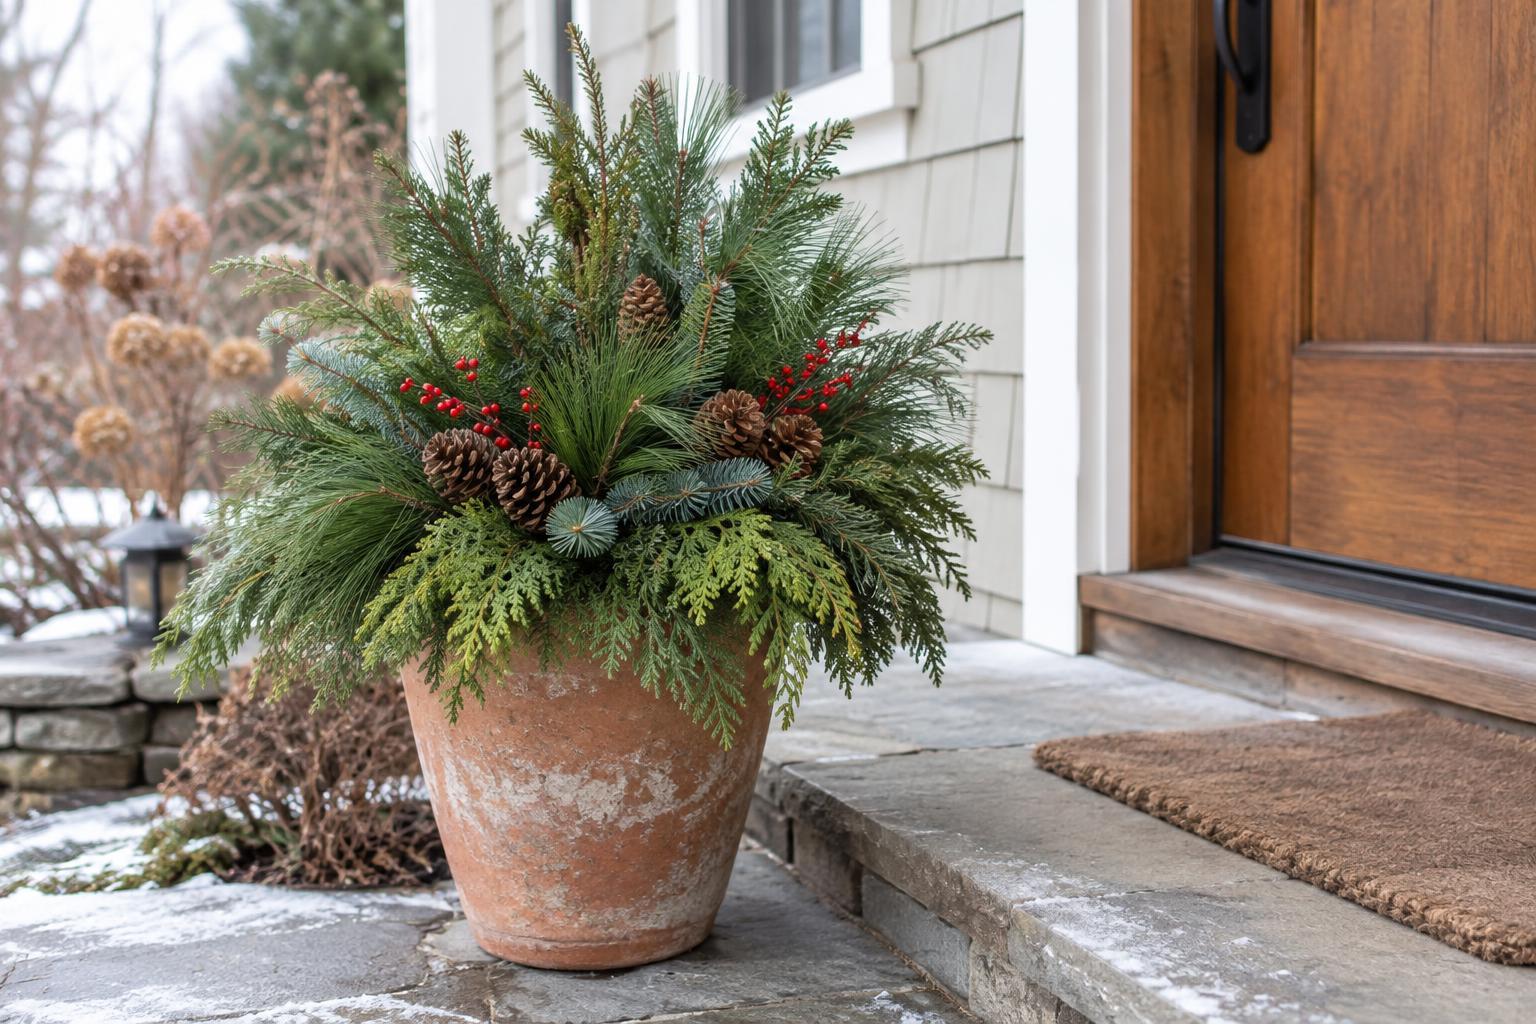
Choose three types of greenery if you can: upright branches for height, fuller stems for the middle and flexible sprigs to soften the rim. Pine, spruce, cedar and holly can offer different textures, depending on what grows locally and what you can obtain. You do not need every variety. A mix of long and short pieces from one evergreen can look just as considered.
Take cuttings only from plants you own or have permission to trim. Cut small amounts from several areas rather than stripping one side of a shrub, and use clean, sharp pruners. Alternatively, ask a local plant seller for loose greenery. Check unfamiliar plants before using them, especially where children or pets can reach the display. Avoid adding species that may spread where you live, and keep berries or other tempting decorations out of reach.
Build a firm base
For a temporary display, fill the pot with slightly damp potting mix or reuse the firm soil already in it. Press it down enough to hold stems, leaving a little space below the rim. You are arranging cut branches, not planting them to grow, so the main goal is stability. If the soil is frozen solid when you begin, let it thaw somewhere protected before inserting the stems rather than forcing them in.
Push the thickest upright branches into the center or toward the back if the container will be viewed from one side. Insert each stem deeply enough to stand without wobbling. Add shorter, bushier cuttings around them, turning the pot as you work if it will be seen from all directions. Finish with trailing or gently arching greenery at the edge. Step back between additions; leaving a little open space lets each shape show.
Add simple winter details
A few accents can give the greenery a focal point without making the pot crowded. Try bare twigs for extra height, pinecones tucked between branches or a weather-resistant ribbon tied around a sturdy stem. Natural materials can shift in wind, so secure light pieces with garden twine or florist wire and tuck sharp wire ends away. Avoid loose items that could blow into a path or drain.
If your doorway is sheltered, you might repeat one accent from elsewhere nearby, such as the color of a doormat or door. For an exposed balcony, keep the outline compact and skip tall branches that catch strong gusts. The display should suit its setting as well as your view of it.
Keep it neat through winter
Fresh cuttings will gradually dry, particularly in sun or wind. When the potting mix is thawed and feels dry, a little water may help the stems stay fresh, but do not leave the pot waterlogged. Check after windy weather for loose branches and remove any foliage that has turned brittle or unattractive. You can replace individual stems without rebuilding the whole arrangement.
At the end of the season, take the container apart rather than leaving old cuttings in place. Remove any wire, ribbon or other non-plant materials before disposing of the greenery according to local arrangements. Empty or refresh the potting mix as needed, and the same container will be ready for a spring planting.